How to use the iPhone App
A short guide on using the On-Demand Transit rider app for iOS
Downloading the Mobile App
-
On your Apple device, visit the App Store
-
Search for On Demand Transit: Rider App
-
Download the app
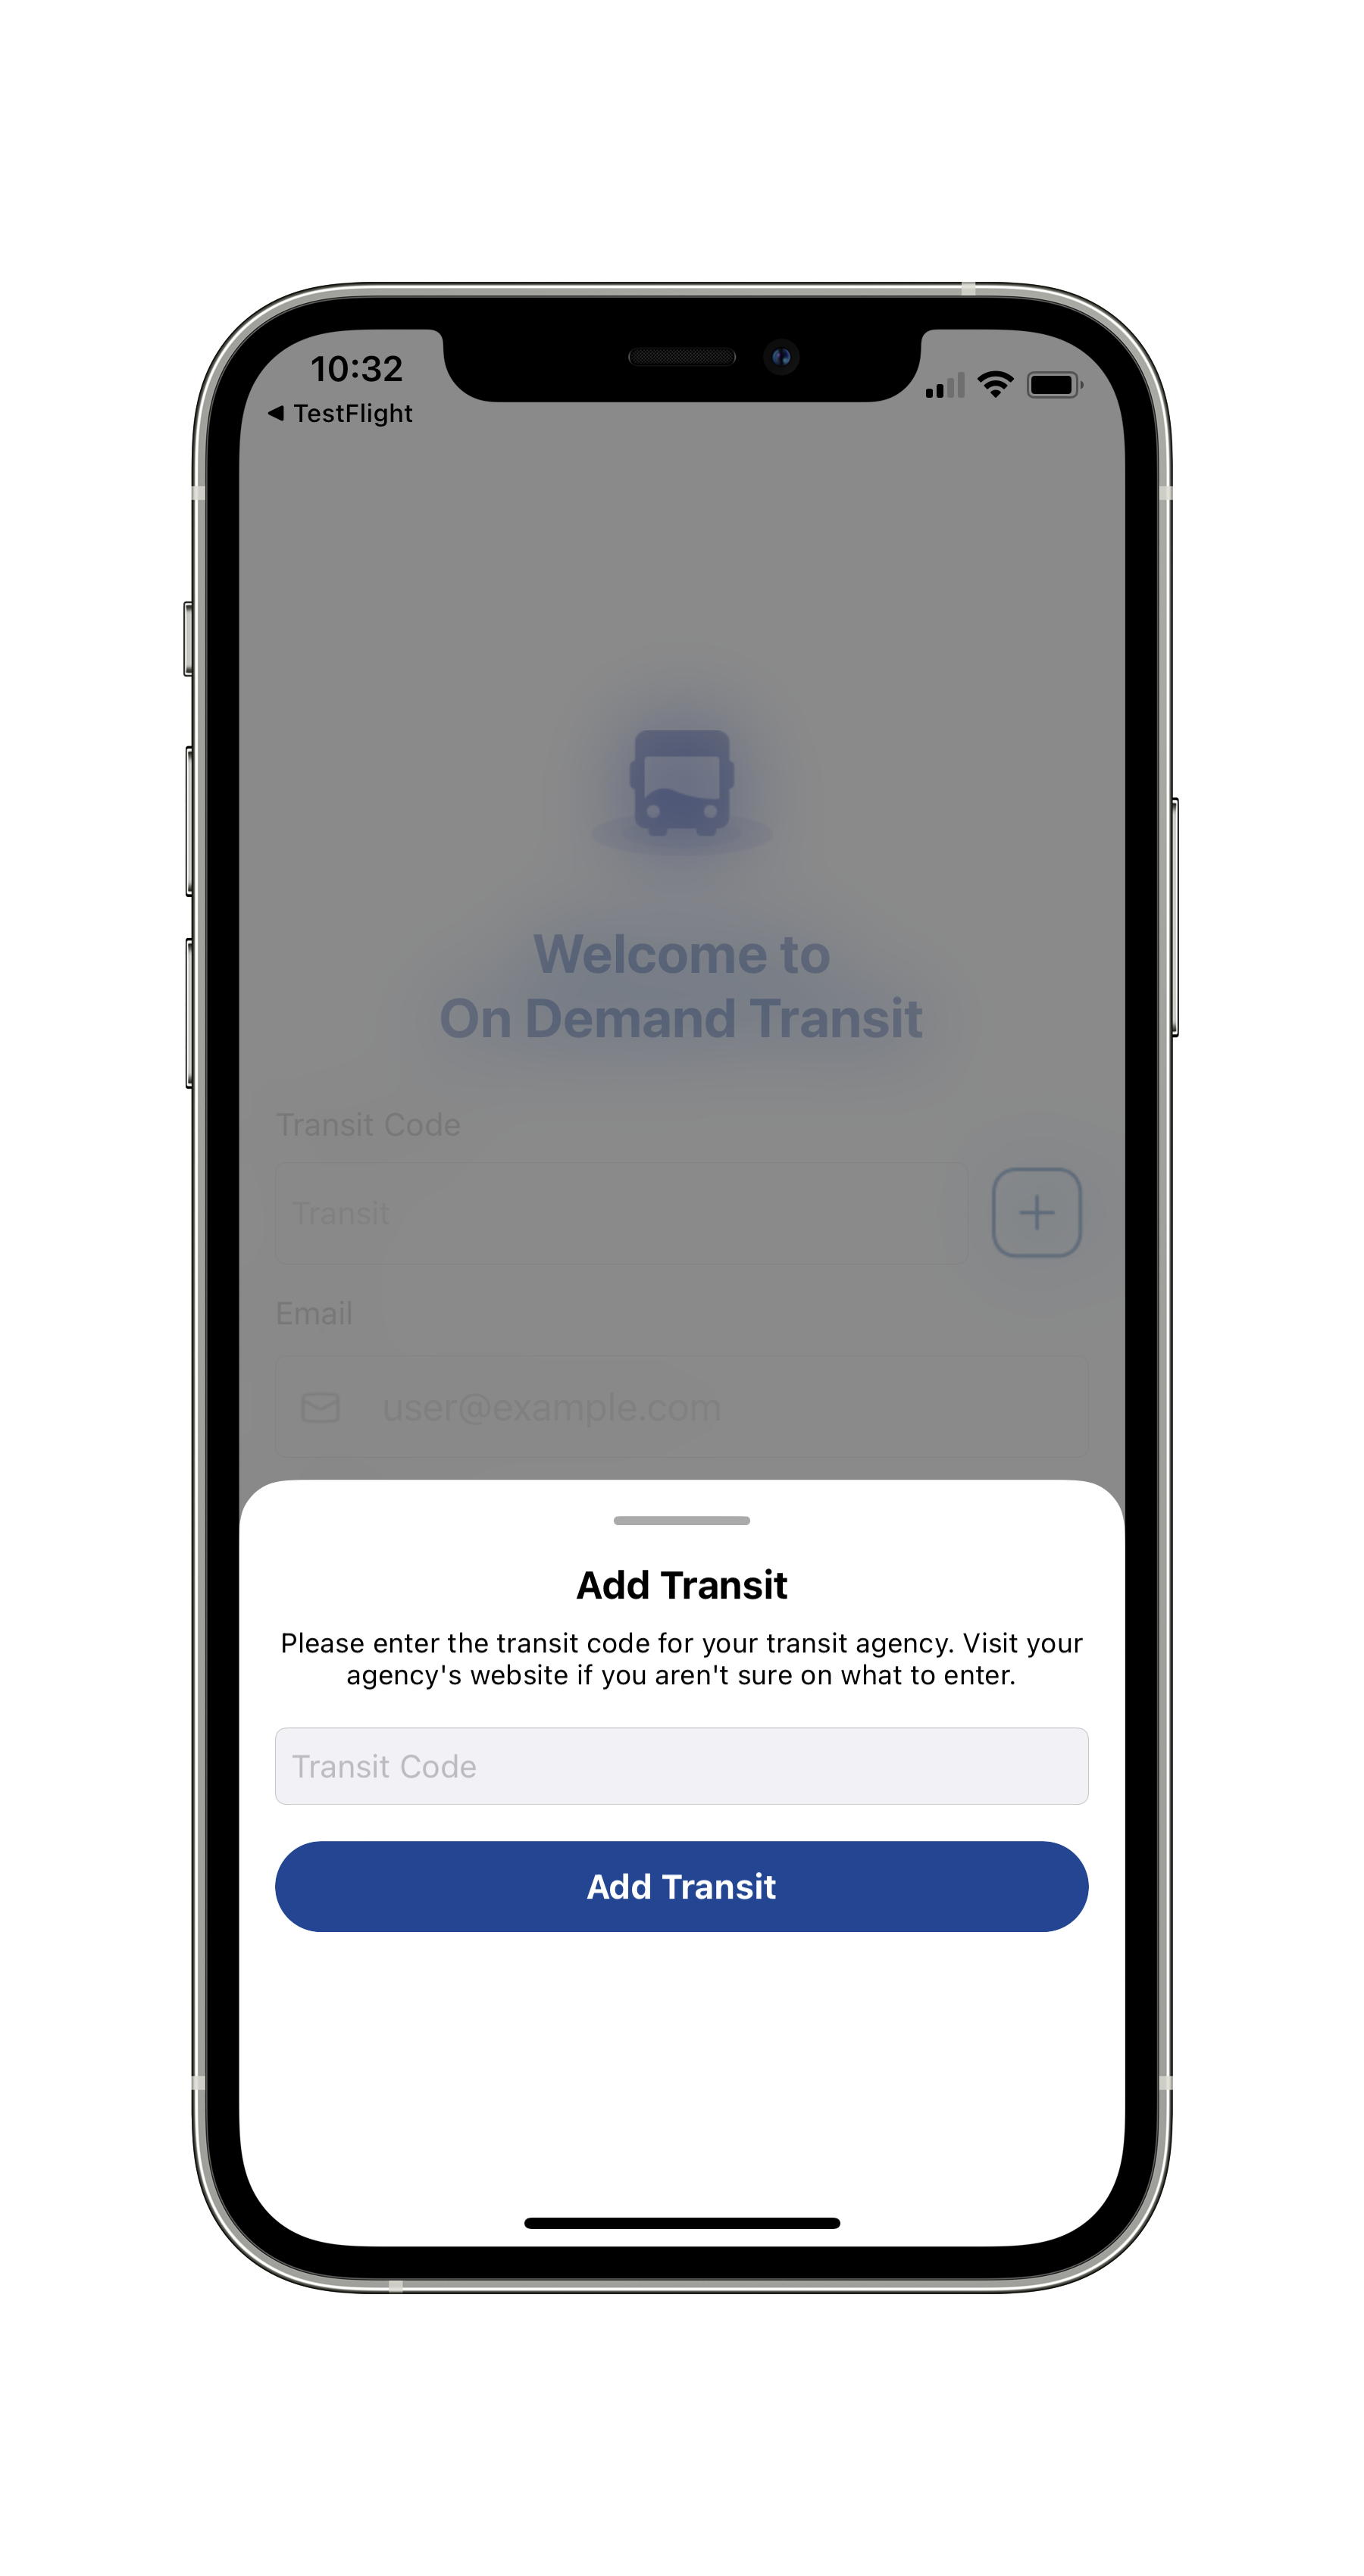
Enter your Transit Code
You will need to enter your organization’s Transit Code to ensure you’re connecting
to the correct transit service.
-
Visit your organization’s website, or ask your organization for the code
-
Enter the code. You will only need to do this once!
Signing Up
-
Tap the blue “Sign Up” text below the login button
-
Enter an e-mail and password
-
Review the terms and conditions by tapping the blue “Terms & Conditions” text, then check the box to agree
-
Tap the “Sign Up” button
-
Check your e-mail inbox, and select the confirmation link within the confirmation e-mail
E-mail not showing up? Check your spam folder!
Logging In
-
Enter your e-mail and password
-
Press the Log In button
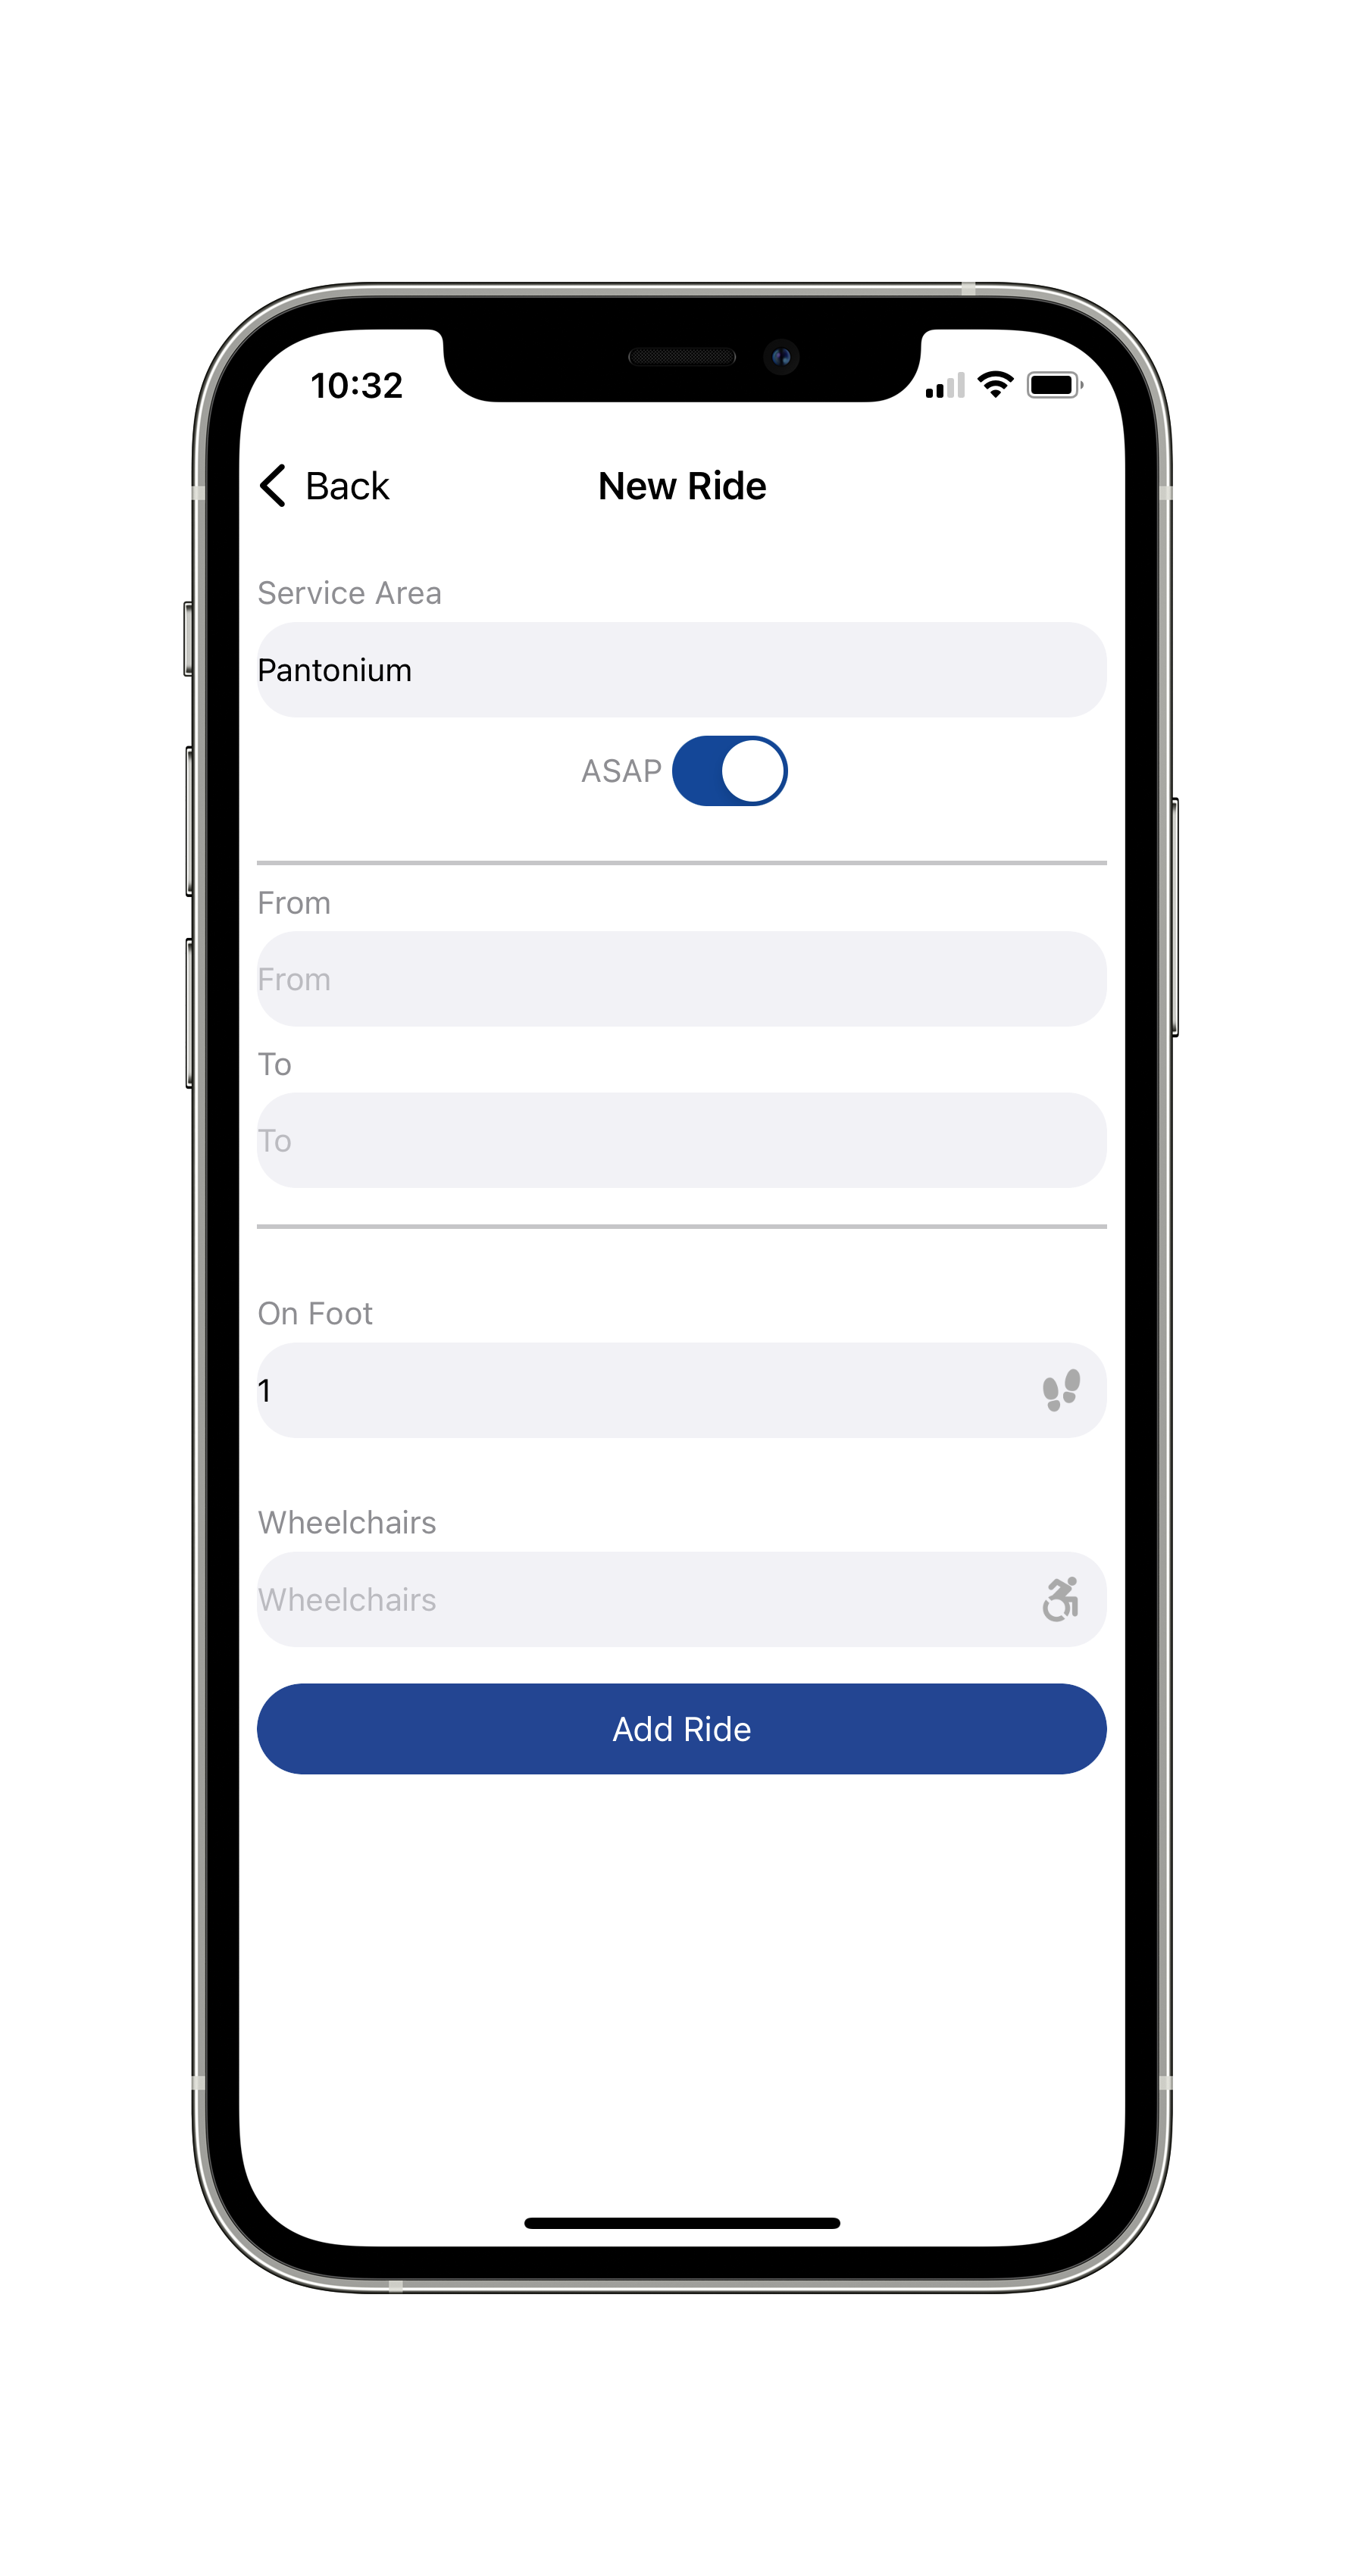
Requesting a Ride
On the dashboard, press new ride. Enter the following:
-
Choose your service area
-
Choose the time of your ride
To request a ride as soon as possible, toggle the ASAP button.To request a ride in the future, toggle “ASAP” off. To set this time based on when you would like to be picked up, press Pick up. To set a time based on when you would like to be dropped off at your destination, press Drop Off.
-
Choose your From and To locations
The locations you can request a trip to and from will change depending on your service. Some services can book from addresses or points of interest, while others are restricted to only transit stops. -
Enter the number of people riding with you
-
Press Add Ride
This error means that your agency has restricted rides between the two stops you selected. This typically means that your trip falls into a different service (e.g. a fixed route bus) – and you should use that service to get to your destination.
Monitoring your Ride
After requesting a ride, you can monitor it in your app using the dashboard. You can open the dashboard from anywhere in the app by tapping the left-most icon in the menu bar at the bottom of the screen.
-
After requesting a ride, you will be assigned to a vehicle.
-
As your vehicle approaches, your screen will read Coming Soon and give you an ETA.
-
Once your vehicle arrives, confirm your boarding with your driver
Depending on your agency, you may be asked to scan the QR code displayed on your app OR simply confirm verbally with your driver

Cancelling & Rebooking
You can cancel a ride at anytime, or re-book rides that were booked in the past.
-
Select Rides by tapping on the bus icon in the menu bar across the bottom of the screen.
-
You can view upcoming and recent trips in the “Active” tab. These can be cancelled by tapping “Cancel”.
-
You can view past trips in the “Past” tab. These can be rebooked by tapping “ReBook”. You’ll be given the option to rebook the trip exactly, or to flip the pickup and dropoff stops, then you can choose when to schedule the rebooked trip to take place.
Favorite Rides
Use the favorite ride feature to save and quickly add common trips you take in your on-demand service.
-
Select Rides by tapping on the bus icon in the menu bar across the bottom of the screen.
-
Find the ride you’re interested in, then tap the heart icon next to it
-
Enter a name for your favorite trip and press Save Ride
-
To book your favorite ride, select the Favorite Rides heart icon in the centre of the menu bar
-
Find the trip you’d interested in, then tap “ReBook”
-
You’ll be given the option to rebook the trip exactly, or to flip the pickup and dropoff stops. Then, you can choose what time the new trip should be requested for.